
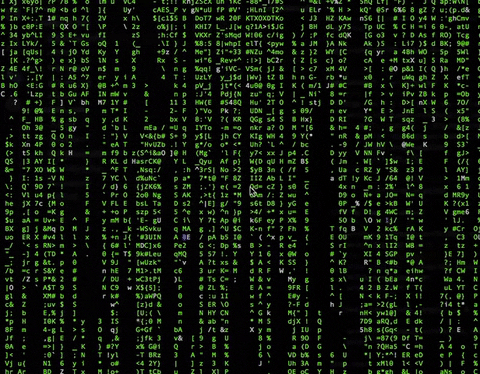
相信大家都对黑客帝国电影里的矩阵雨印象非常深刻,就是下面这个效果。
效果非常酷炫,我看了一下相关实现库的代码,也非常简单,核心就是用好命令行的控制字符,这里分享一下。
在 matrix-rainopen in new window 的源代码中,总共只有两个文件,ansi.js 和 index.js,非常小巧。
控制字符和控制序列
ansi.js 中定义了一些命令行的操作方法,也就是对控制字符做了一些方法封装,代码如下:
const ctlEsc = `\x1b[`;
const ansi = {
  reset: () => `${ctlEsc}c`,
  clearScreen: () => `${ctlEsc}2J`,
  cursorHome: () => `${ctlEsc}H`,
  cursorPos: (row, col) => `${ctlEsc}${row};${col}H`,
  cursorVisible: () => `${ctlEsc}?25h`,
  cursorInvisible: () => `${ctlEsc}?25l`,
  useAltBuffer: () => `${ctlEsc}?47h`,
  useNormalBuffer: () => `${ctlEsc}?47l`,
  underline: () => `${ctlEsc}4m`,
  off: () => `${ctlEsc}0m`,
  bold: () => `${ctlEsc}1m`,
  color: c => `${ctlEsc}${c};1m`,

  colors: {
    fgRgb: (r, g, b) => `${ctlEsc}38;2;${r};${g};${b}m`,
    bgRgb: (r, g, b) => `${ctlEsc}48;2;${r};${g};${b}m`,
    fgBlack: () => ansi.color(`30`),
    fgRed: () => ansi.color(`31`),
    fgGreen: () => ansi.color(`32`),
    fgYellow: () => ansi.color(`33`),
    fgBlue: () => ansi.color(`34`),
    fgMagenta: () => ansi.color(`35`),
    fgCyan: () => ansi.color(`36`),
    fgWhite: () => ansi.color(`37`),
    bgBlack: () => ansi.color(`40`),
    bgRed: () => ansi.color(`41`),
    bgGreen: () => ansi.color(`42`),
    bgYellow: () => ansi.color(`43`),
    bgBlue: () => ansi.color(`44`),
    bgMagenta: () => ansi.color(`45`),
    bgCyan: () => ansi.color(`46`),
    bgWhite: () => ansi.color(`47`),
  },
};

module.exports = ansi;
2
3
4
5
6
7
8
9
10
11
12
13
14
15
16
17
18
19
20
21
22
23
24
25
26
27
28
29
30
31
32
33
34
35
36
37
38
这里面 ansi 对象上的每一个方法不做过多解释了。我们看到,每个方法都是返回一个奇怪的字符串,通过这些字符串可以改变命令行的显示效果。
这些字符串其实是一个个控制字符组成的控制序列。那什么是控制字符呢?我们应该都知道 ASC 字符集,这个字符集里面除了定义了一些可见字符以外,还有很多不可见的字符,就是控制字符。这些控制字符可以控制打印机、命令行等设备的显示和动作。
有两个控制字符集,分别是 CO 字符集和 C1 字符集。C0 字符集是 0x00 到 0x1F 这两个十六进制数范围内的字符,而 C1 字符集是 0x80 到 0x9F 这两个十六进制数范围内的字符。C0 和 C1 字符集内的字符和对应的功能可以在这里open in new window查到,我们不做详细描述了。
上面代码中,\x1b[ 其实是一个组合,\x1b 定义了 ESC 键,后跟 [ 表示这是一个控制序列导入器(Control Sequence Introducer,CSI)open in new window。在 \x1b[ 后面的所有字符都会被命令行解析为控制字符。
常用的控制序列有这些:
| 序列 | 功能 |
|---|---|
| CSI n A | 向上移动 n(默认为 1) 个单元 |
| CSI n A | 向下移动 n(默认为 1) 个单元 |
| CSI n C | 向前移动 n(默认为 1) 个单元 |
| CSI n D | 向后移动 n(默认为 1) 个单元 |
| CSI n E | 将光标移动到 n(默认为 1) 行的下一行行首 |
| CSI n F | 将光标移动到 n(默认为 1) 行的前一行行首 |
| CSI n G | 将光标移动到当前行的第 n(默认为 1)列 |
CSI n ; m H | 移动光标到指定位置,第 n 行,第 m 列。n 和 m 默认为 1,即 CSI ;5H 与 CSI 1;5H 等同。 |
| CSI n J | 清空屏幕。如果 n 为 0(或不指定),则从光标位置开始清空到屏幕末尾;如果 n 为 1,则从光标位置清空到屏幕开头;如果 n 为 2,则清空整个屏幕;如果 n 为 3,则不仅清空整个屏幕,同时还清空滚动缓存。 |
| CSI n K | 清空行,如果 n 为 0(或不指定),则从光标位置清空到行尾;如果 n 为 1,则从光标位置清空到行头;如果 n 为 2,则清空整行,光标位置不变。 |
| CSI n S | 向上滚动 n (默认为 1)行 |
| CSI n T | 向下滚动 n (默认为 1)行 |
CSI n ; m f | 与 CSI n ; m H 功能相同 |
| CSI n m | 设置显示效果,如 CSI 1 m 表示设置粗体,CSI 4 m 为添加下划线。 |
我们可以通过 CSI n m 控制序列来控制显示效果,在设置一种显示以后,后续字符都会沿用这种效果,直到我们改变了显示效果。可以通过 CSI 0 m 来清楚显示效果。常见的显示效果可以在SGR (Select Graphic Rendition) parametersopen in new window 查到,这里受篇幅限制就不做赘述了。
上面的代码中,还定义了一些颜色,我们看到颜色的定义都是一些数字,其实每一个数字都对应一种颜色,这里列一下常见的颜色。
| 前景色 | 背景色 | 名称 | 前景色 | 背景色 | 名称 |
|---|---|---|---|---|---|
| 30 | 40 | 黑色 | 90 | 100 | 亮黑色 |
| 31 | 41 | 红色 | 91 | 101 | 亮红色 |
| 32 | 42 | 绿色 | 92 | 102 | 亮绿色 |
| 33 | 43 | 黄色 | 93 | 103 | 亮黄色 |
| 34 | 44 | 蓝色 | 94 | 104 | 亮蓝色 |
| 35 | 45 | 品红色(Magenta) | 95 | 105 | 亮品红色(Magenta) |
| 36 | 46 | 青色(Cyan) | 96 | 106 | 亮青色(Cyan) |
| 37 | 47 | 白色 | 97 | 107 | 亮白色 |
上面的代码中,使用了 CSI n;1m 的形式来定义颜色,其实是两种效果的,一个是具体颜色值,一个是加粗,一些命令行实现中会使用加粗效果来定义亮色。比如,如果直接定义 CSI 32 m 可能最终展示的是暗绿色,我们改成 CSI 32;1m 则将显示亮绿色。
颜色支持多种格式,上面的是 3-bit 和 4-bitopen in new window 格式,同时还有 8-bitopen in new window 和 24-bitopen in new window。代码中也有使用样例,这里不再赘述了。
矩阵渲染
在 matrix-rain 的代码中,index.js 里的核心功能是 MatrixRain 这个类:
class MatrixRain {
  constructor(opts) {
    this.transpose = opts.direction === `h`;
    this.color = opts.color;
    this.charRange = opts.charRange;
    this.maxSpeed = 20;
    this.colDroplets = [];
    this.numCols = 0;
    this.numRows = 0;

    // handle reading from file
    if (opts.filePath) {
      if (!fs.existsSync(opts.filePath)) {
        throw new Error(`${opts.filePath} doesn't exist`);
      }
      this.fileChars = fs.readFileSync(opts.filePath, `utf-8`).trim().split(``);
      this.filePos = 0;
      this.charRange = `file`;
    }
  }

  generateChars(len, charRange) {
    // by default charRange == ascii
    let chars = new Array(len);

    if (charRange === `ascii`) {
      for (let i = 0; i < len; i++) {
        chars[i] = String.fromCharCode(rand(0x21, 0x7E));
      }
    } else if (charRange === `braille`) {
      for (let i = 0; i < len; i++) {
        chars[i] = String.fromCharCode(rand(0x2840, 0x28ff));
      }
    } else if (charRange === `katakana`) {
      for (let i = 0; i < len; i++) {
        chars[i] = String.fromCharCode(rand(0x30a0, 0x30ff));
      }
    } else if (charRange === `emoji`) {
      // emojis are two character widths, so use a prefix
      const emojiPrefix = String.fromCharCode(0xd83d);
      for (let i = 0; i < len; i++) {
        chars[i] = emojiPrefix + String.fromCharCode(rand(0xde01, 0xde4a));
      }
    } else if (charRange === `file`) {
      for (let i = 0; i < len; i++, this.filePos++) {
        this.filePos = this.filePos < this.fileChars.length ? this.filePos : 0;
        chars[i] = this.fileChars[this.filePos];
      }
    }

    return chars;
  }

  makeDroplet(col) {
    return {
      col,
      alive: 0,
      curRow: rand(0, this.numRows),
      height: rand(this.numRows / 2, this.numRows),
      speed: rand(1, this.maxSpeed),
      chars: this.generateChars(this.numRows, this.charRange),
    };
  }

  resizeDroplets() {
    [this.numCols, this.numRows] = process.stdout.getWindowSize();

    // transpose for direction
    if (this.transpose) {
      [this.numCols, this.numRows] = [this.numRows, this.numCols];
    }

    // Create droplets per column
    // add/remove droplets to match column size
    if (this.numCols > this.colDroplets.length) {
      for (let col = this.colDroplets.length; col < this.numCols; ++col) {
        // make two droplets per row that start in random positions
        this.colDroplets.push([this.makeDroplet(col), this.makeDroplet(col)]);
      }
    } else {
      this.colDroplets.splice(this.numCols, this.colDroplets.length - this.numCols);
    }
  }

  writeAt(row, col, str, color) {
    // Only output if in viewport
    if (row >=0 && row < this.numRows && col >=0 && col < this.numCols) {
      const pos = this.transpose ? ansi.cursorPos(col, row) : ansi.cursorPos(row, col);
      write(`${pos}${color || ``}${str || ``}`);
    }
  }

  renderFrame() {
    const ansiColor = ansi.colors[`fg${this.color.charAt(0).toUpperCase()}${this.color.substr(1)}`]();

    for (const droplets of this.colDroplets) {
      for (const droplet of droplets) {
        const {curRow, col: curCol, height} = droplet;
        droplet.alive++;

        if (droplet.alive % droplet.speed === 0) {
          this.writeAt(curRow - 1, curCol, droplet.chars[curRow - 1], ansiColor);
          this.writeAt(curRow, curCol, droplet.chars[curRow], ansi.colors.fgWhite());
          this.writeAt(curRow - height, curCol, ` `);
          droplet.curRow++;
        }

        if (curRow - height > this.numRows) {
          // reset droplet
          Object.assign(droplet, this.makeDroplet(droplet.col), {curRow: 0});
        }
      }
    }

    flush();
  }
}
2
3
4
5
6
7
8
9
10
11
12
13
14
15
16
17
18
19
20
21
22
23
24
25
26
27
28
29
30
31
32
33
34
35
36
37
38
39
40
41
42
43
44
45
46
47
48
49
50
51
52
53
54
55
56
57
58
59
60
61
62
63
64
65
66
67
68
69
70
71
72
73
74
75
76
77
78
79
80
81
82
83
84
85
86
87
88
89
90
91
92
93
94
95
96
97
98
99
100
101
102
103
104
105
106
107
108
109
110
111
112
113
114
115
116
117
还有几个工具方法:
// Simple string stream buffer + stdout flush at once
let outBuffer = [];
function write(chars) {
  return outBuffer.push(chars);
}

function flush() {
  process.stdout.write(outBuffer.join(``));
  return outBuffer = [];
}

function rand(start, end) {
  return start + Math.floor(Math.random() * (end - start));
}
2
3
4
5
6
7
8
9
10
11
12
13
14
matrix-rain 的启动代码如下:
const args = argParser.parseArgs();
const matrixRain = new MatrixRain(args);

function start() {
  if (!process.stdout.isTTY) {
    console.error(`Error: Output is not a text terminal`);
    process.exit(1);
  }

  // clear terminal and use alt buffer
  process.stdin.setRawMode(true);
  write(ansi.useAltBuffer());
  write(ansi.cursorInvisible());
  write(ansi.colors.bgBlack());
  write(ansi.colors.fgBlack());
  write(ansi.clearScreen());
  flush();
  matrixRain.resizeDroplets();
}

function stop() {
  write(ansi.cursorVisible());
  write(ansi.clearScreen());
  write(ansi.cursorHome());
  write(ansi.useNormalBuffer());
  flush();
  process.exit();
}

process.on(`SIGINT`, () => stop());
process.stdin.on(`data`, () => stop());
process.stdout.on(`resize`, () => matrixRain.resizeDroplets());
setInterval(() => matrixRain.renderFrame(), 16); // 60FPS

start();
2
3
4
5
6
7
8
9
10
11
12
13
14
15
16
17
18
19
20
21
22
23
24
25
26
27
28
29
30
31
32
33
34
35
首先初始化一个 MatrixRain 类,然后调用 start 方法。start 方法中通过 MatrixRain 的 resizeDroplets 方法来初始化要显示的内容。
MatrixRain 类实例中管理着一个 colDroplets 数组,保存这每一列的雨滴。在 resizeDroplets 中我们可以看到,每一列有两个雨滴。
在启动代码中我们还可以看到,每隔 16 毫秒会调用一次 renderFrame 方法来绘制页面。而 renderFrame 方法中,会遍历每一个 colDroplet 中的每一个雨滴。由于每一个雨滴的初始位置和速度都是随机的,通过 droplet.alive 和 droplet.speed 的比值来确定每一次渲染的时候是否更新这个雨滴位置,从而达到每个雨滴的下落参差不齐的效果。当雨滴已经移出屏幕可视范围后会被重置。
每一次渲染,都是通过 write 函数向全局的缓存中写入数据,之后通过 flush 函数一把更新。
 关注微信公众号,获取最新推送~
 加微信,深入交流~